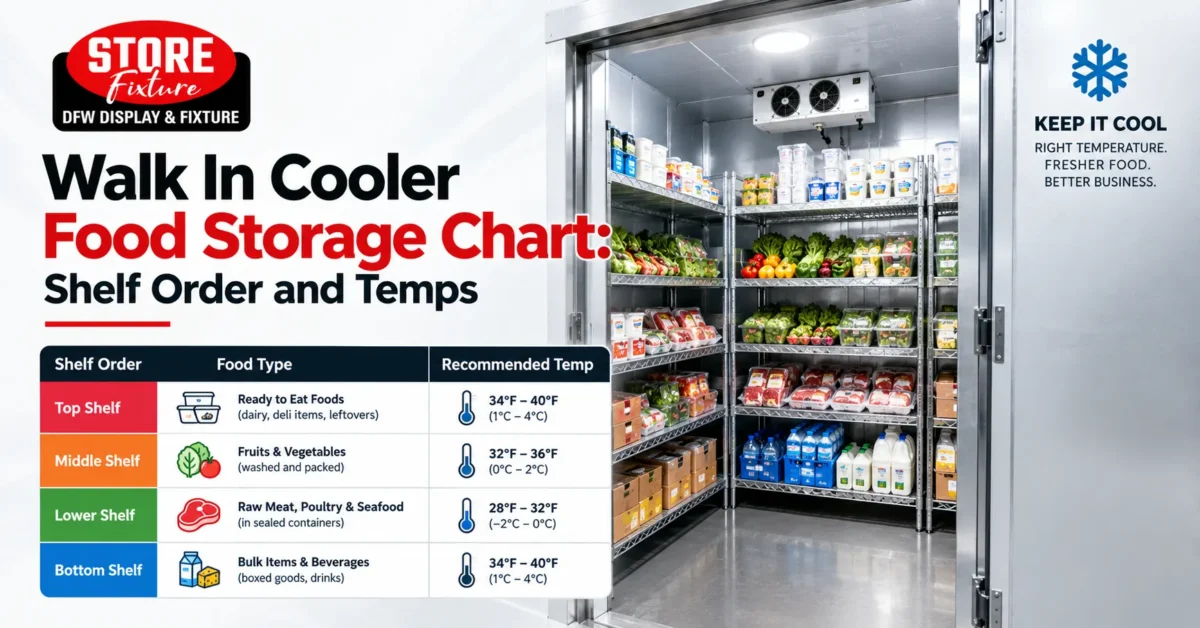
A walk in cooler food storage chart tells your staff exactly where each type of food goes, from the top shelf to the bottom. The rule behind it is simple: foods that need the least cooking go at the top, and foods that need the most cooking go at the bottom. That way, if raw juices drip, they land on something that will be cooked hot enough to make it safe.
This guide gives you a ready-to-use shelf order, the temperatures to hold, how to space product for airflow and the daily checks that keep a walk in cooler organized. It follows the shelf order and cold holding guidance in the FDA Food Code, which most US health departments base their inspections on. Always confirm your local health code, since some cities add their own rules.
Walk In Cooler Food Storage Chart: Shelf Order
Read this walk in cooler food storage chart from the top shelf down. The cooking temperatures listed are the minimum internal temperatures in the FDA Food Code for each food group.
- Top shelf: ready-to-eat foods. Prepared salads, cooked foods, deli items, cheeses, dairy, washed and cut produce, sauces and anything that will not be cooked again.
- Second shelf: whole seafood and fish. Cooked to 145°F.
- Third shelf: whole cuts of beef, pork, veal and lamb, plus shell eggs cooked for immediate service. Steaks, roasts and chops are cooked to 145°F.
- Fourth shelf: ground meats and ground fish. Ground beef, ground pork, sausage and injected or tenderized meats are cooked to 155°F.
- Bottom shelf: raw poultry. Whole and ground chicken, turkey and duck, plus stuffed meats, are cooked to 165°F.
If your walk in cooler has fewer shelf levels, keep the same order across separate shelving units: ready-to-eat on one rack, raw proteins on another, with poultry always lowest.
Where Produce, Dairy and Beverages Go
Not every item fits the protein order above. Use these placements:
- Unwashed whole produce: on a dedicated rack or upper shelf away from raw meat. Never below raw proteins.
- Dairy and eggs in cartons: upper shelves with other ready-to-eat items, unless shell eggs will be cooked, in which case they can sit with whole cuts.
- Beverages and sealed packaged goods: any shelf, but keeping them away from raw meat avoids contamination of the packaging.
- Leftovers and prepped items: top shelf, covered, labelled and dated.
Storing Specific Foods Correctly
Some items cause confusion even when the shelf order is posted. These placements keep them safe:
- Thawing meat: thawing under refrigeration at 41°F or below is an approved method. Put thawing meat in a pan on the shelf that matches its raw category, so poultry still thaws on the bottom.
- Opened canned goods: move the contents into a clean, covered food container, label it with the date and store it with other ready-to-eat items.
- Cooked rice, pasta and beans: cool them quickly in shallow pans, cover and store on the top shelf. These foods are a common source of problems when cooled slowly.
- Marinating proteins: keep them in covered containers on the shelf for that protein, never above ready-to-eat items.
- Sauces and dressings made in house: top shelf, covered, labelled and date marked.
| Tier | Rack model | Facing capacity | Price | Payback |
|---|
Adapting the Chart to Your Business
The shelf order never changes, but the layout around it depends on what you sell.
Restaurants and commercial kitchens usually need the full chart, since they handle every protein group plus prepped ready-to-eat items. Dedicating separate shelving units to raw and ready-to-eat foods makes the order easy to follow during a rush.
Convenience stores often store mostly sealed drinks, dairy and packaged sandwiches. If you also run a hot food counter, keep raw chicken for frying on the lowest shelf of a separate unit, well away from grab-and-go items.
Grocery stores and butchers move large volumes of raw meat. Many use a separate walk in cooler for raw proteins and another for produce and dairy. Where one room serves both, place raw meat racks on the side furthest from the door so they are not passed by staff carrying ready-to-eat stock.
Catering and prep kitchens hold a lot of cooked food. Clear labelling and strict first in, first out rotation matter most here, because prepared food has the shortest safe holding time.
What Temperature Should a Walk In Cooler Be?
The FDA Food Code requires cold foods that need time and temperature control to be held at 41°F or below. Most operators set a walk in cooler between 35°F and 38°F, which gives a safety margin when the door is opened during deliveries or busy service.
Avoid setting the thermostat too low. Below about 33°F, produce and some dairy can begin to freeze, which damages texture and causes waste.
Temperature Zones Inside the Room
A walk in cooler is not the same temperature everywhere:
- Near the door: the warmest area, because warm air enters every time the door opens.
- Near the evaporator: the coldest area, where delicate produce can freeze if stacked too close.
- Middle of the room: the most stable zone, best for highly perishable items.
Place a hanging air thermometer near the door, the warmest point, so a reading there tells you the whole room is within range.
Spacing, Airflow and Shelving
Cold air has to reach every product. A packed room with blocked airflow develops warm pockets even when the thermostat reads correctly.
- Off the floor: the Food Code requires food to be stored at least 6 inches above the floor. Use shelving or dunnage racks, never bare floor.
- Away from walls: leave a few inches between product and walls so air can circulate.
- Clear of the evaporator: do not stack boxes in front of or directly under the evaporator coil. Blocking it reduces cooling and causes ice buildup.
- Gaps between items: avoid wrapping shelves in solid cardboard or stacking cases tight against each other.
Shelving matters more than most operators expect. Wire or louvered shelving lets air pass through. Solid shelves block it. For cold rooms, heavy duty storage shelves with adjustable levels make it easy to set up the shelf order in this walk in cooler food storage chart and change it as your menu or product mix changes.
Labelling, Dating and Stock Rotation
A chart only works if staff can see what is on each shelf and how old it is.
Label Everything
Each container should show:
- The name of the food.
- The date it was prepared or opened.
- The use-by or discard date.
- The initials of the person who prepared it, if your kitchen tracks this.
Date Marking Rules
Under the FDA Food Code, ready-to-eat foods that need temperature control and are held for more than 24 hours must be date marked. They can be kept for up to 7 days at 41°F or below, counting the day of preparation as day 1. Some local codes are stricter, so check yours.
First In, First Out
Put new deliveries behind or below older stock of the same item, so the oldest product is used first. A simple rule for staff: new stock goes to the back, old stock comes forward.
How to Set Up a Walk In Cooler From Scratch
If you are organizing a new walk in cooler, or resetting a cluttered one, follow these steps:
- Empty and clean. Remove all product, clean shelves, walls and floor, and check door gaskets for damage.
- Check the temperature. Confirm the room holds 41°F or below before reloading. Aim for 35°F to 38°F.
- Map your zones. Decide which shelving units hold ready-to-eat items, which hold raw proteins and where produce goes.
- Label the shelves. Post shelf labels that match this walk in cooler food storage chart so new staff do not have to guess.
- Load from top to bottom. Place ready-to-eat items first on upper shelves, then raw proteins in cooking-temperature order, with poultry lowest.
- Leave airflow gaps. Keep product off walls, off the floor and clear of the evaporator.
- Post the chart. Print the chart and fix it inside the door at eye level.
Daily and Weekly Walk In Cooler Checks
Routine checks catch problems before they become health code violations or spoiled stock.
Every Shift
- Read and log the air temperature.
- Check that raw proteins have not been moved above ready-to-eat foods.
- Make sure the door closes fully and the strip curtain, if fitted, hangs correctly.
- Remove anything past its discard date.
Every Week
- Wipe up spills and clean shelves.
- Check door gaskets for tears or gaps.
- Look for ice on the evaporator coil, which can signal a defrost or airflow problem.
- Review the log for temperature drift.
When to Call a Technician
Call for service if the room cannot hold 41°F, the compressor runs constantly, water pools on the floor or ice builds on the coil. These are signs of a refrigeration or door seal problem, not a storage problem.
Common Walk In Cooler Storage Mistakes
- Storing raw chicken on a top shelf because there was space. This is one of the most common violations inspectors find.
- Placing cases directly on the floor. Even for a short time, this breaks the 6-inch rule and makes cleaning difficult.
- Cooling hot food in deep containers inside the walk in cooler. Large batches cool too slowly and warm surrounding food. Use shallow pans or an ice bath first.
- Overloading the room. Too much product blocks airflow and strains the refrigeration system.
- Leaving the door propped open during deliveries. Warm air floods in and the room takes a long time to recover.
- Unloading deliveries in the wrong order. Put away cold items first and in chart order, starting with ready-to-eat foods, so raw meat is never set down on an upper shelf just because it arrived first.
- Letting the chart go out of date. When the menu or product mix changes, update the posted walk in cooler chart and the shelf labels the same day.
Planning a Walk In Cooler That Makes Storage Easier
Good storage habits are easier when the room is designed for them. A walk in cooler with enough shelf levels, sensible door placement and space for separate raw and ready-to-eat zones makes this chart easy to follow every day.
If your current room is too small to separate food groups properly, it may be time to look at a larger or custom walk in cooler built to your exact dimensions. Our walk in cooler cost guide explains what affects the price, and you can compare chilled storage options in our coolers and freezers range.
DFW Display & Fixture designs and builds walk-in coolers and supplies shelving for retail and food businesses. Call 361-339-0323 or visit our Dallas showroom at 10793 Harry Hines Blvd #120, Monday to Saturday, 9 AM to 6 PM, to talk through a layout that fits the way you store food.
Frequently asked questions
What goes on the top shelf of a walk in cooler?
Ready-to-eat foods go on the top shelf. That includes cooked foods, deli items, dairy, prepared salads and washed produce, since they will not be cooked again before serving.
Why is raw chicken stored on the bottom shelf?
Raw poultry needs the highest cooking temperature, 165°F. Storing it on the bottom shelf means any drips cannot contaminate foods that are cooked to a lower temperature or not cooked at all.
How far off the floor should food be stored?
The FDA Food Code requires food to be stored at least 6 inches above the floor. Use shelving or dunnage racks rather than placing cases on the floor.
What is the ideal walk in cooler temperature?
Food must be held at 41°F or below. Many operators set the room at 35°F to 38°F to keep a safety margin during door openings.
How long can prepared food stay in a walk in cooler?
Ready-to-eat foods that need temperature control can be kept for up to 7 days at 41°F or below when date marked, with the day of preparation counted as day 1. Local rules may be stricter.
Can I store produce next to raw meat?
Keep produce above or away from raw meat. Placing produce below raw proteins risks contamination from drips, especially for items eaten raw.